Installing on Digital Ocean
One of the best ways to host Writebook is to use a cloud provider like Digital Ocean. It's inexpensive and relatively easy to set up if you have a little technical know-how.
Once you've signed up for a Digital Ocean account, just follow these steps to get set up. It should take less than 10 minutes.
Choose
Create > Dropletsfrom the menu in your default project and pick a plan to get the server set up.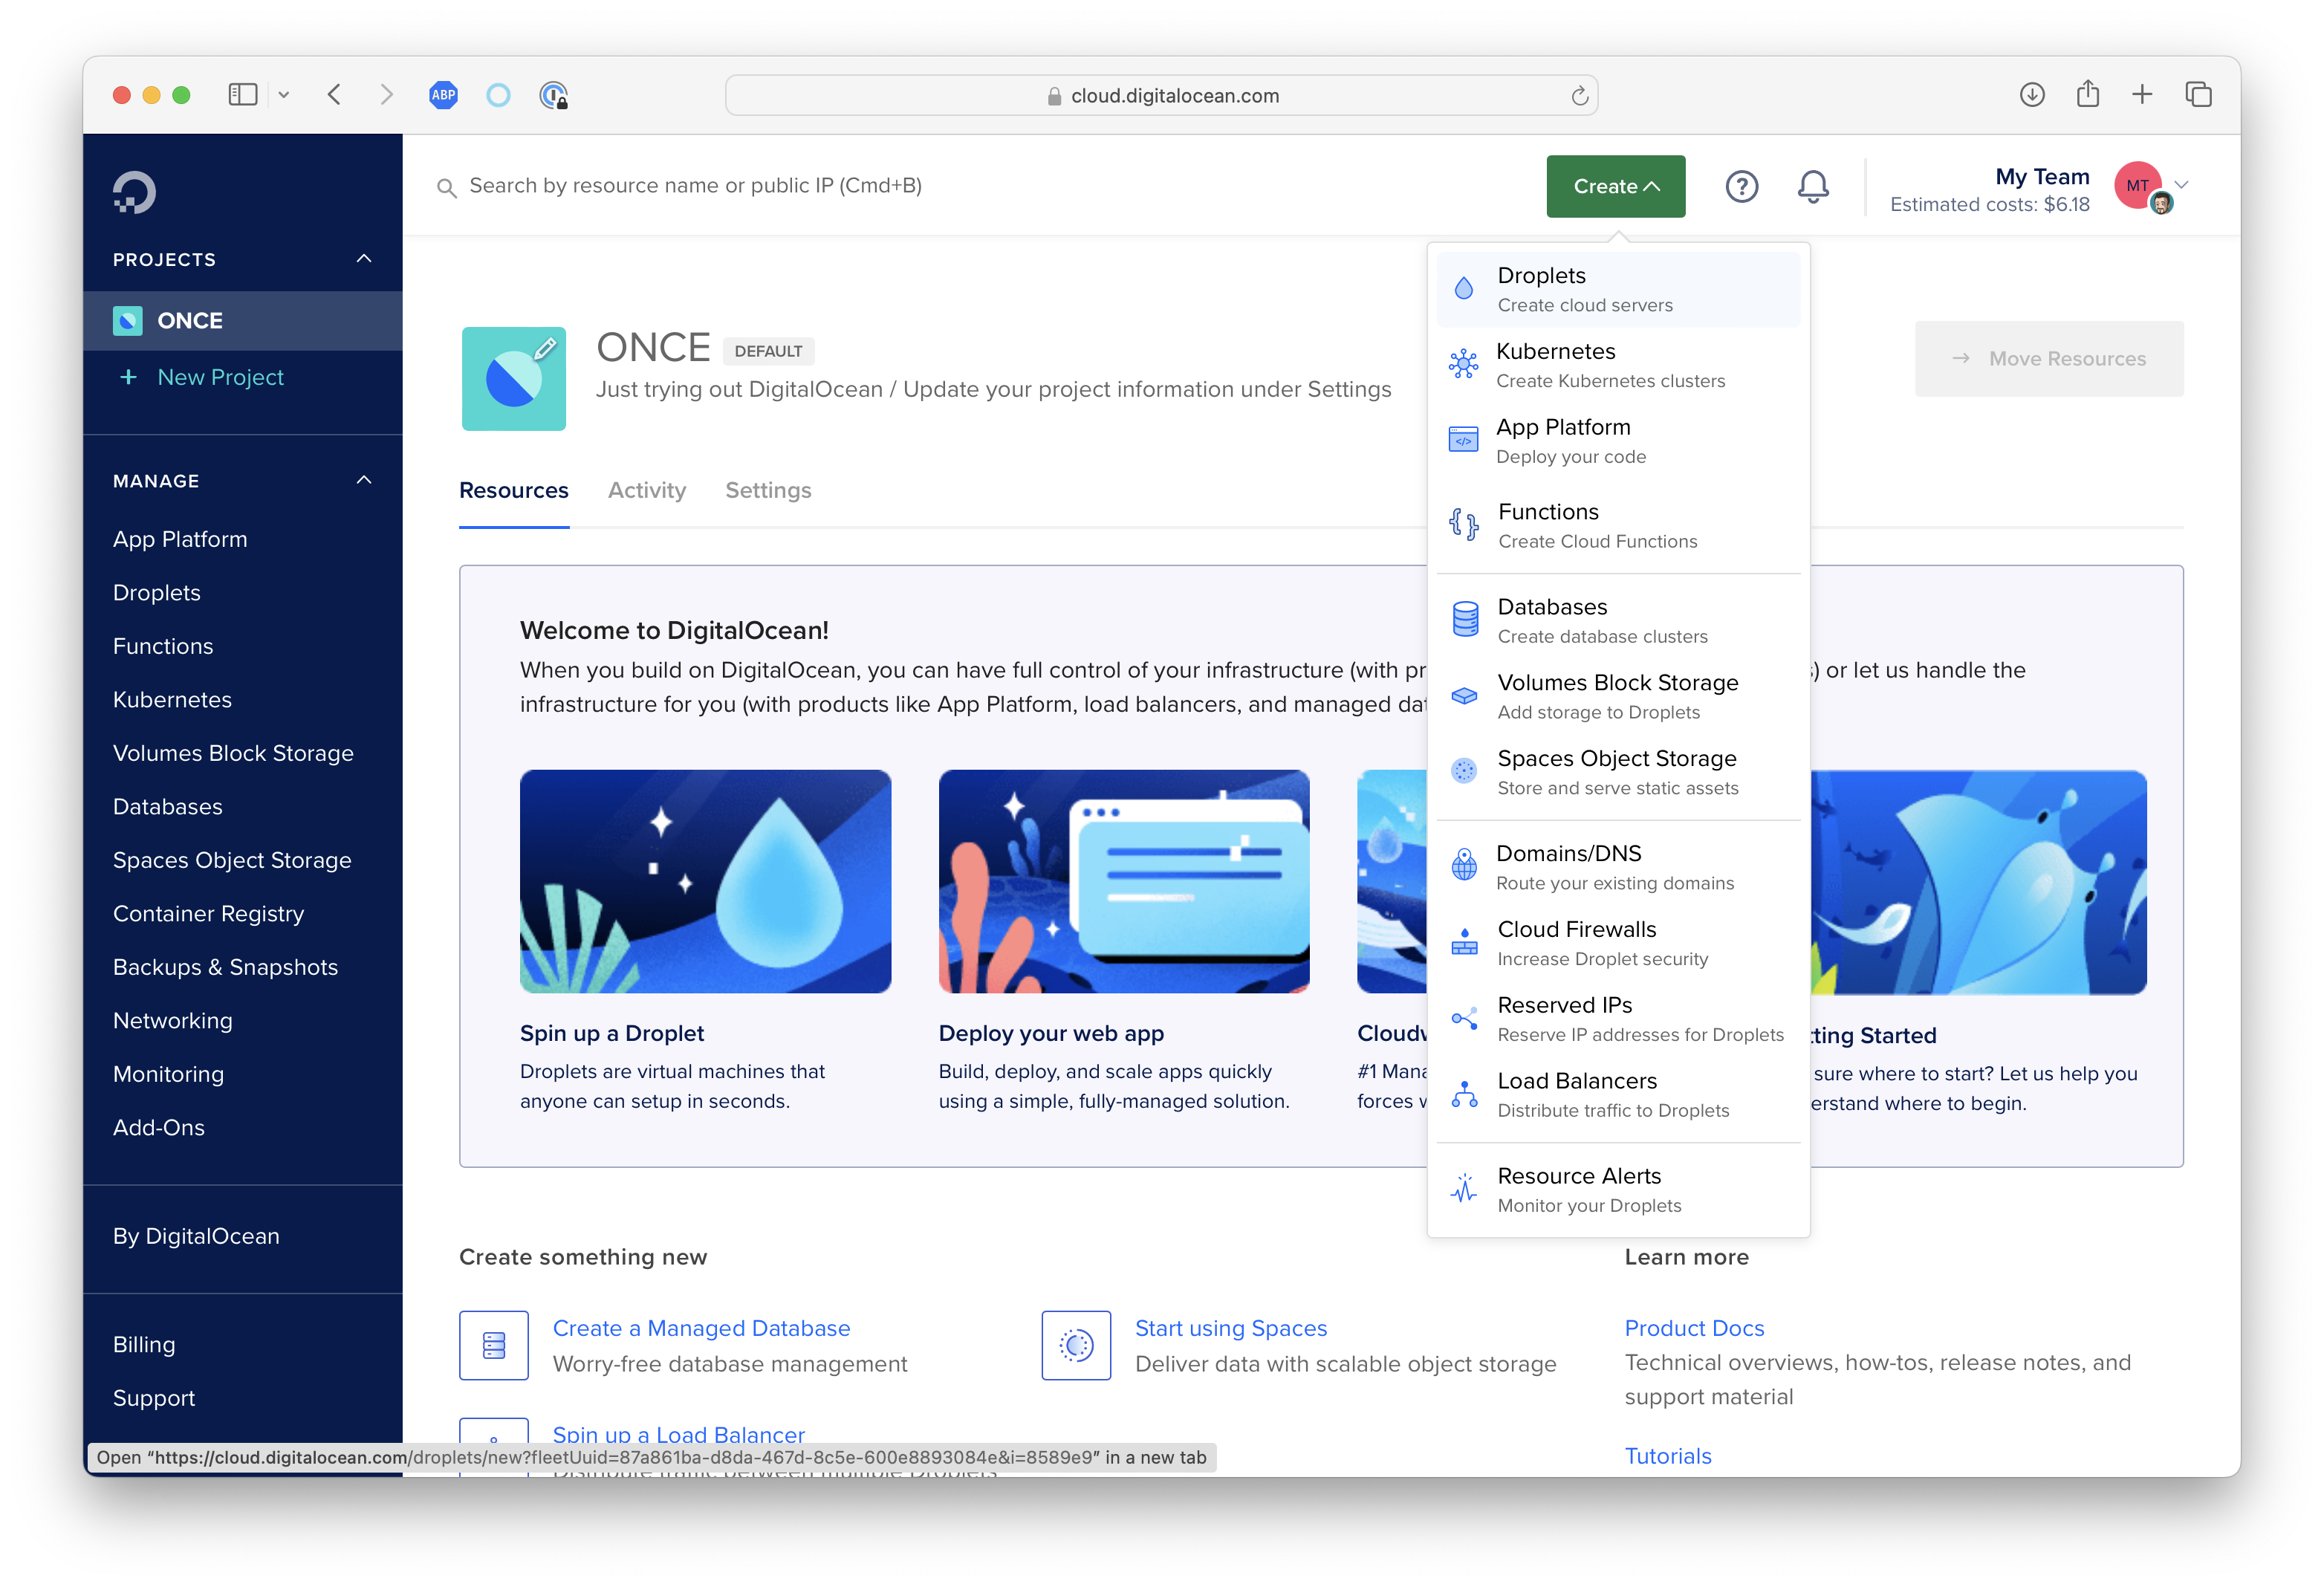 Minimum requirements are 2GB RAM/1CPU. We recommend the following setup:
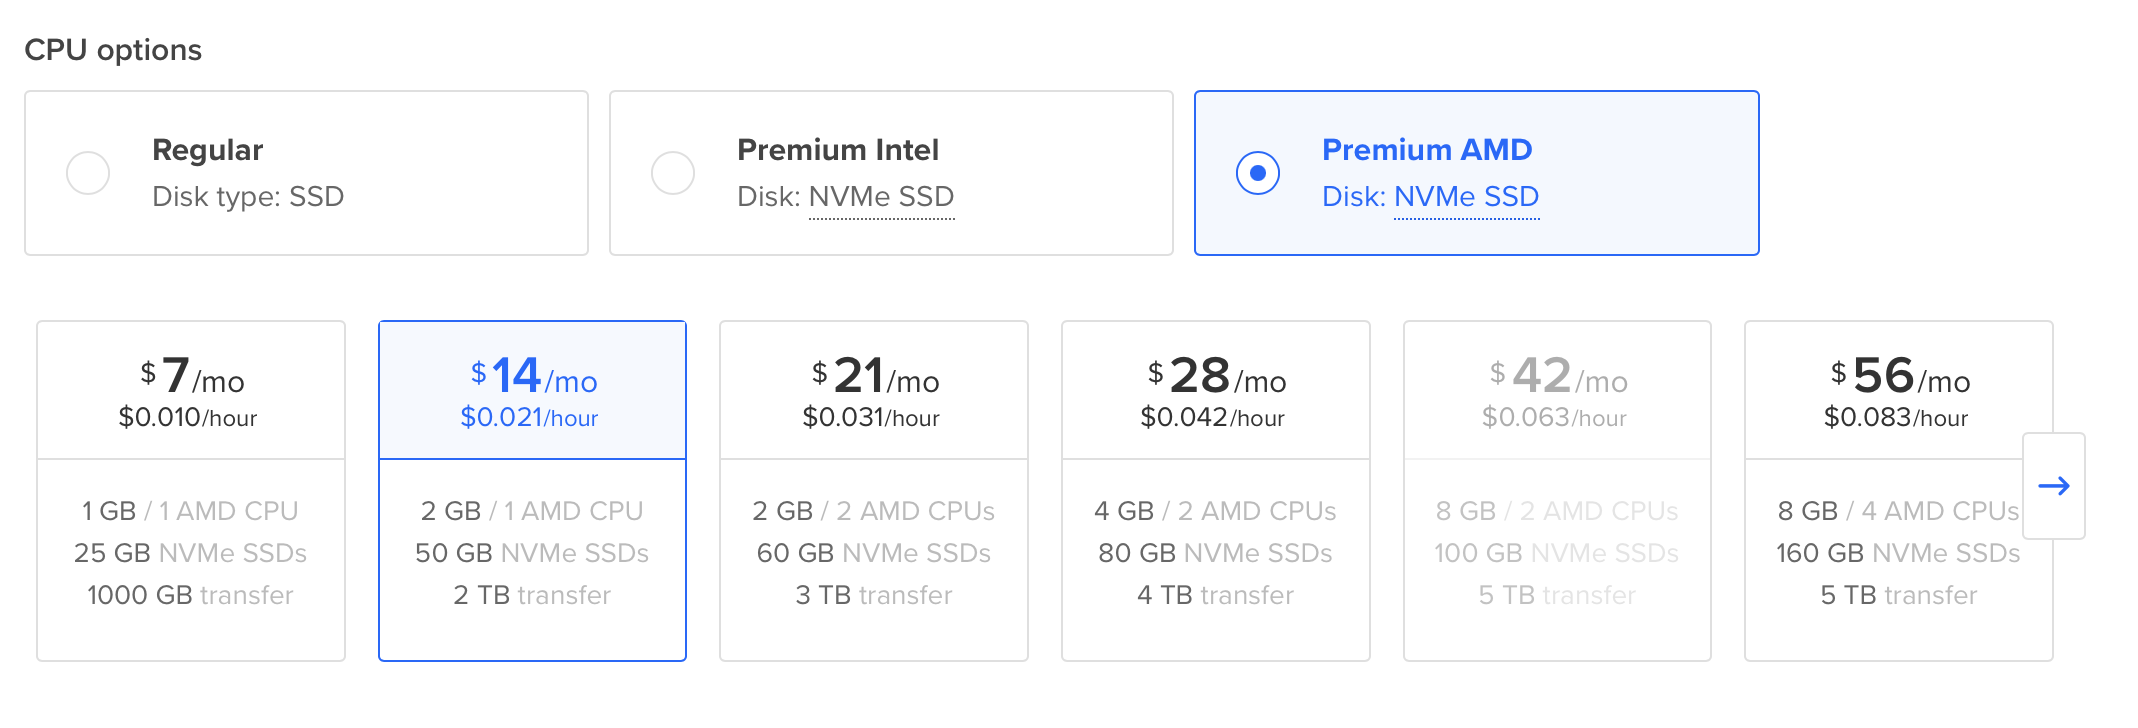
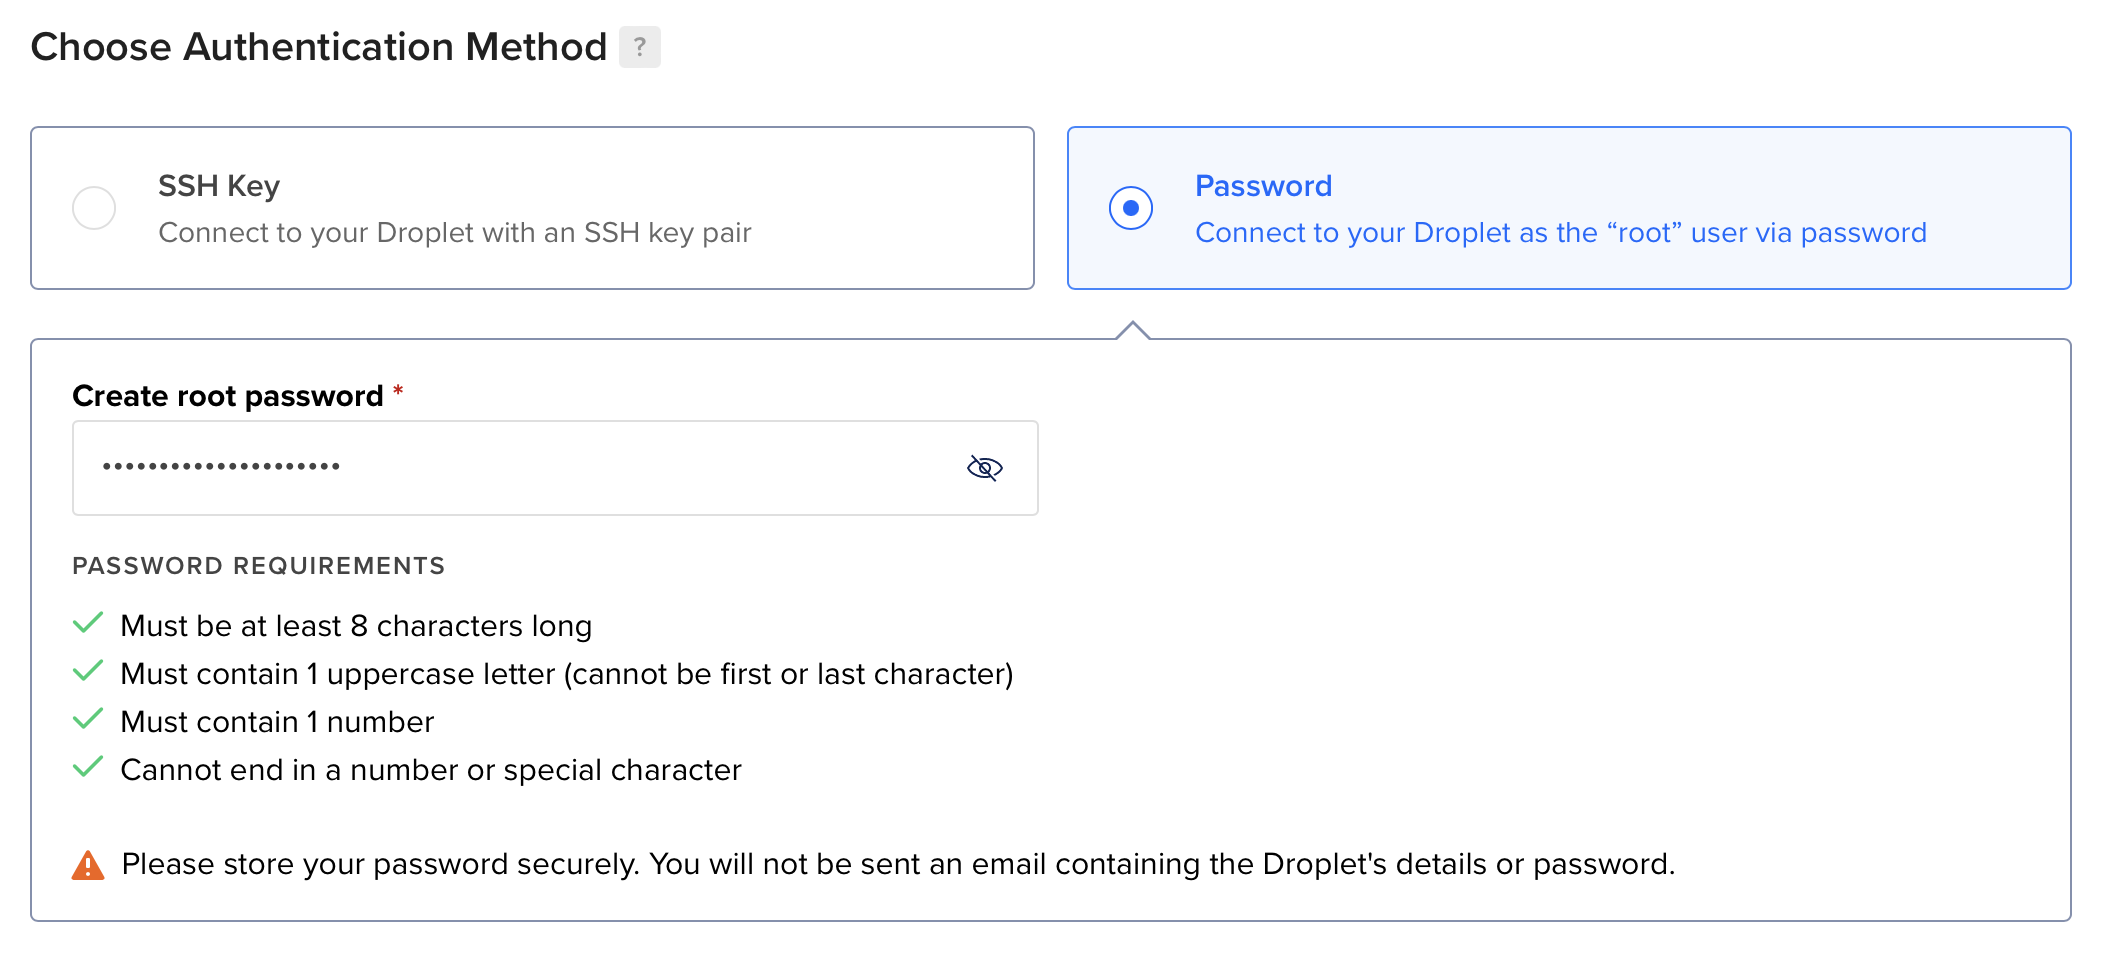
Next, create a password for connecting to the server.
Accept the rest of the defaults and hit "Create Droplet" at the bottom of the screen. It will take just a few minutes for your droplet to be created. Once it's ready, click it to expand.
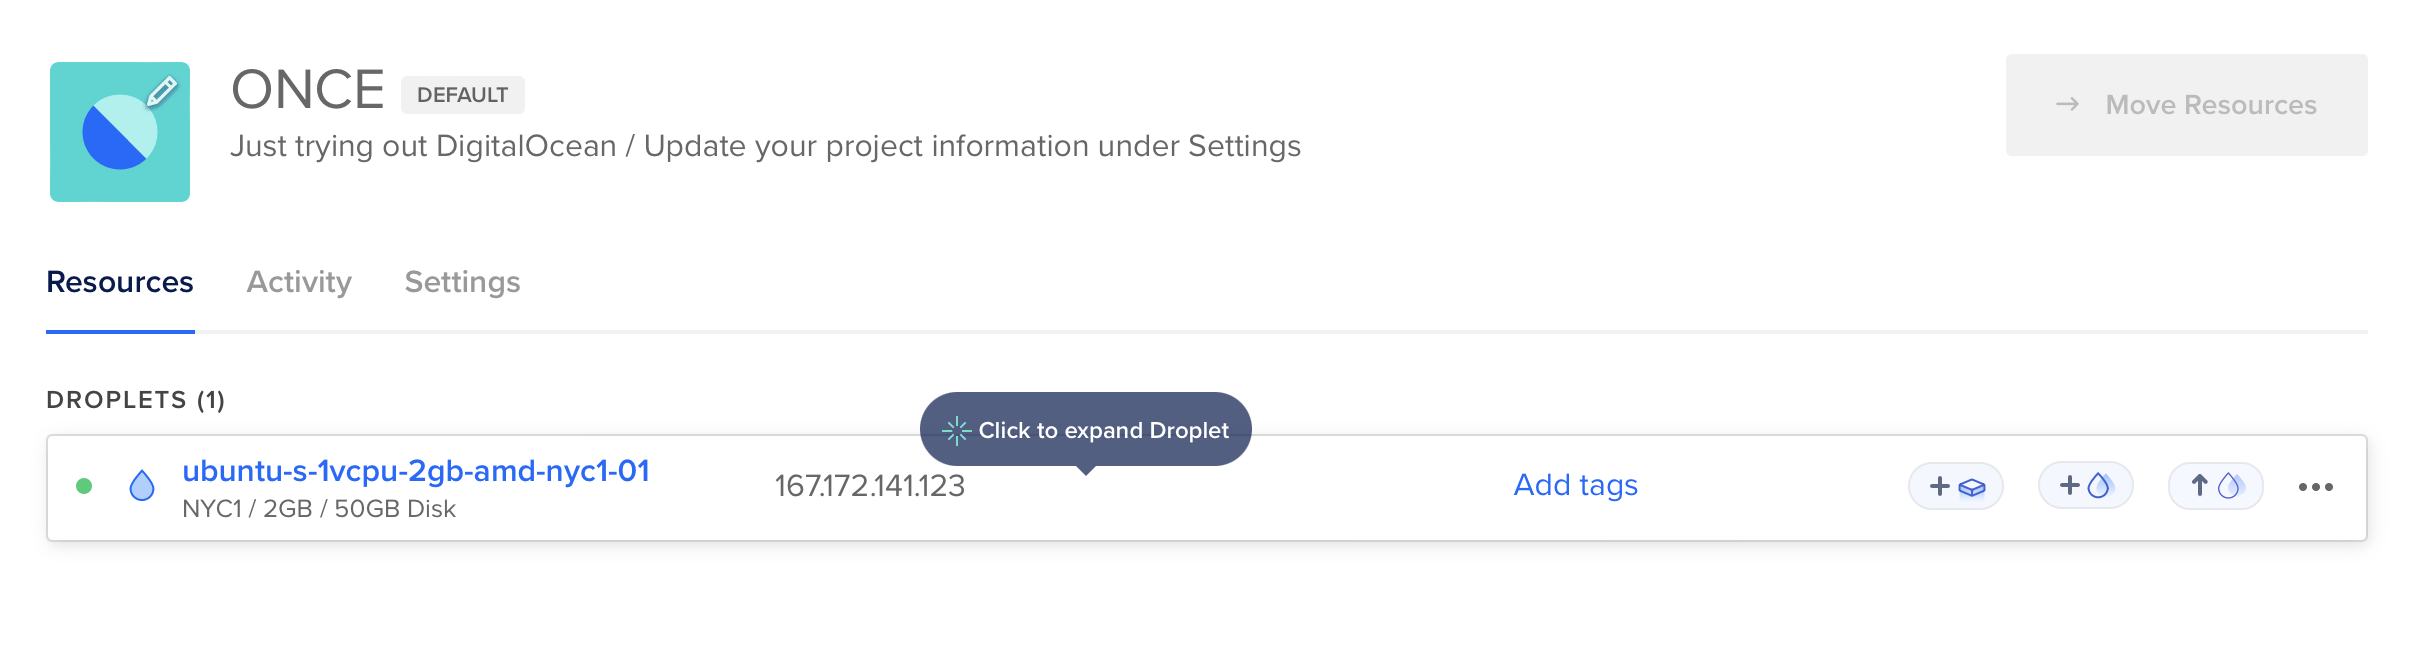
Next, copy the
ipv4address which we'll use to point your domain name to your new cloud server.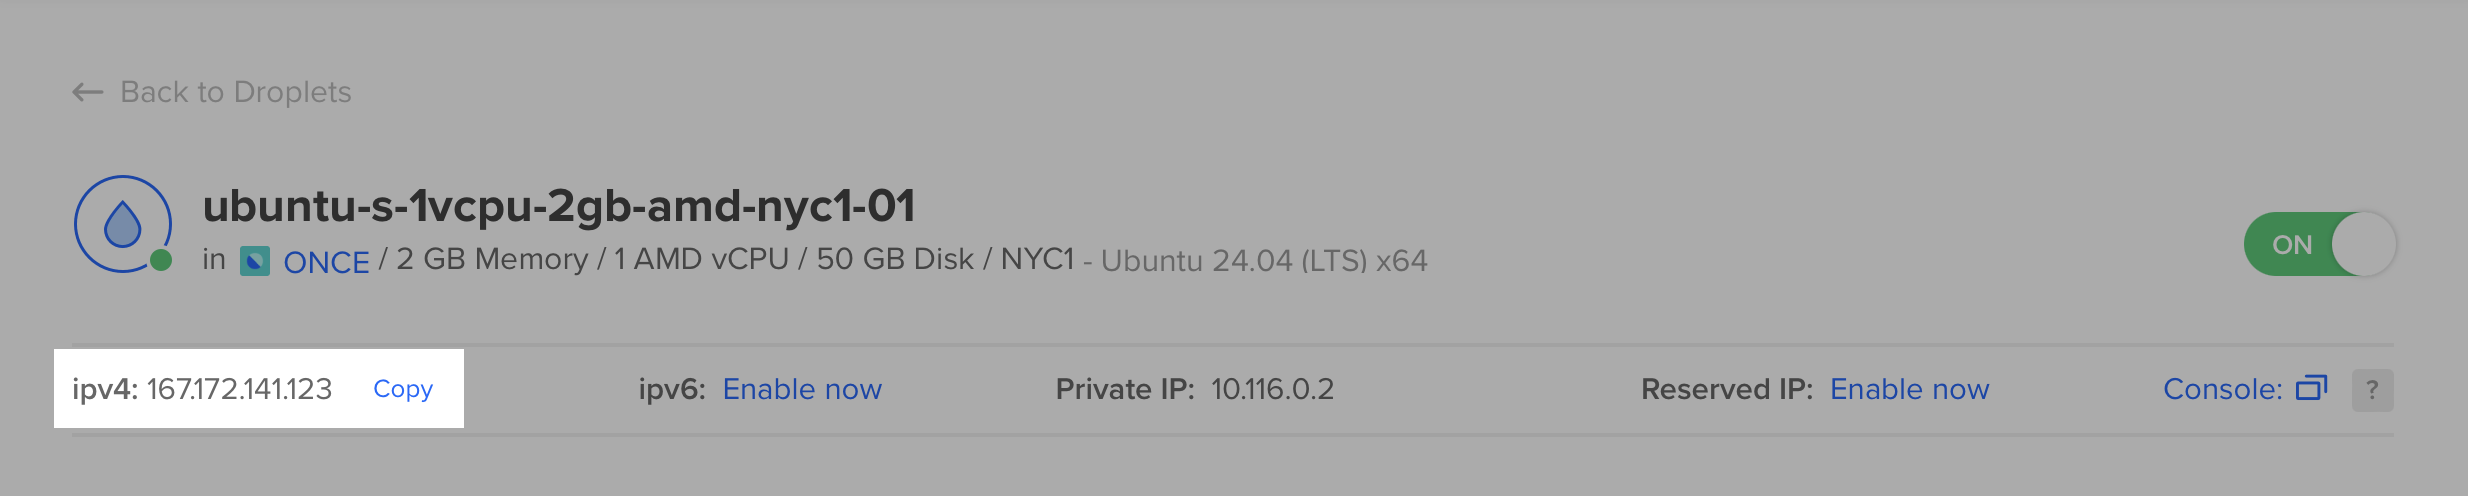
Now head over to wherever your domain is managed. Some common registrars are GoDaddy, namecheap or Squarespace. Sign in and look for a link to manage your domain. You need to add an
A recordthat points to the IP you copied above. It'll look something like this: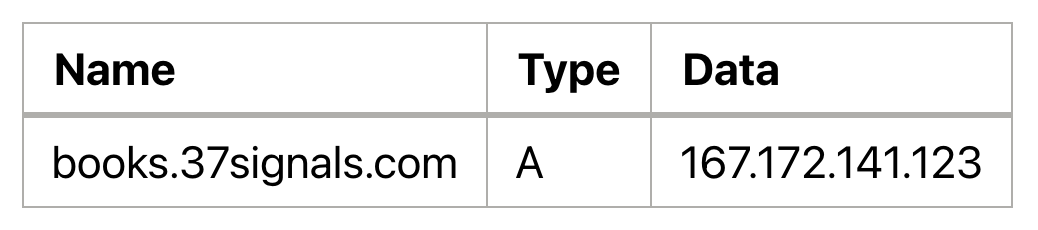
Next, head back over to your Digital Ocean Droplet and open the Console to connect to your server.

Finally, find the install command in the confirmation email we sent you and paste it into the command line:
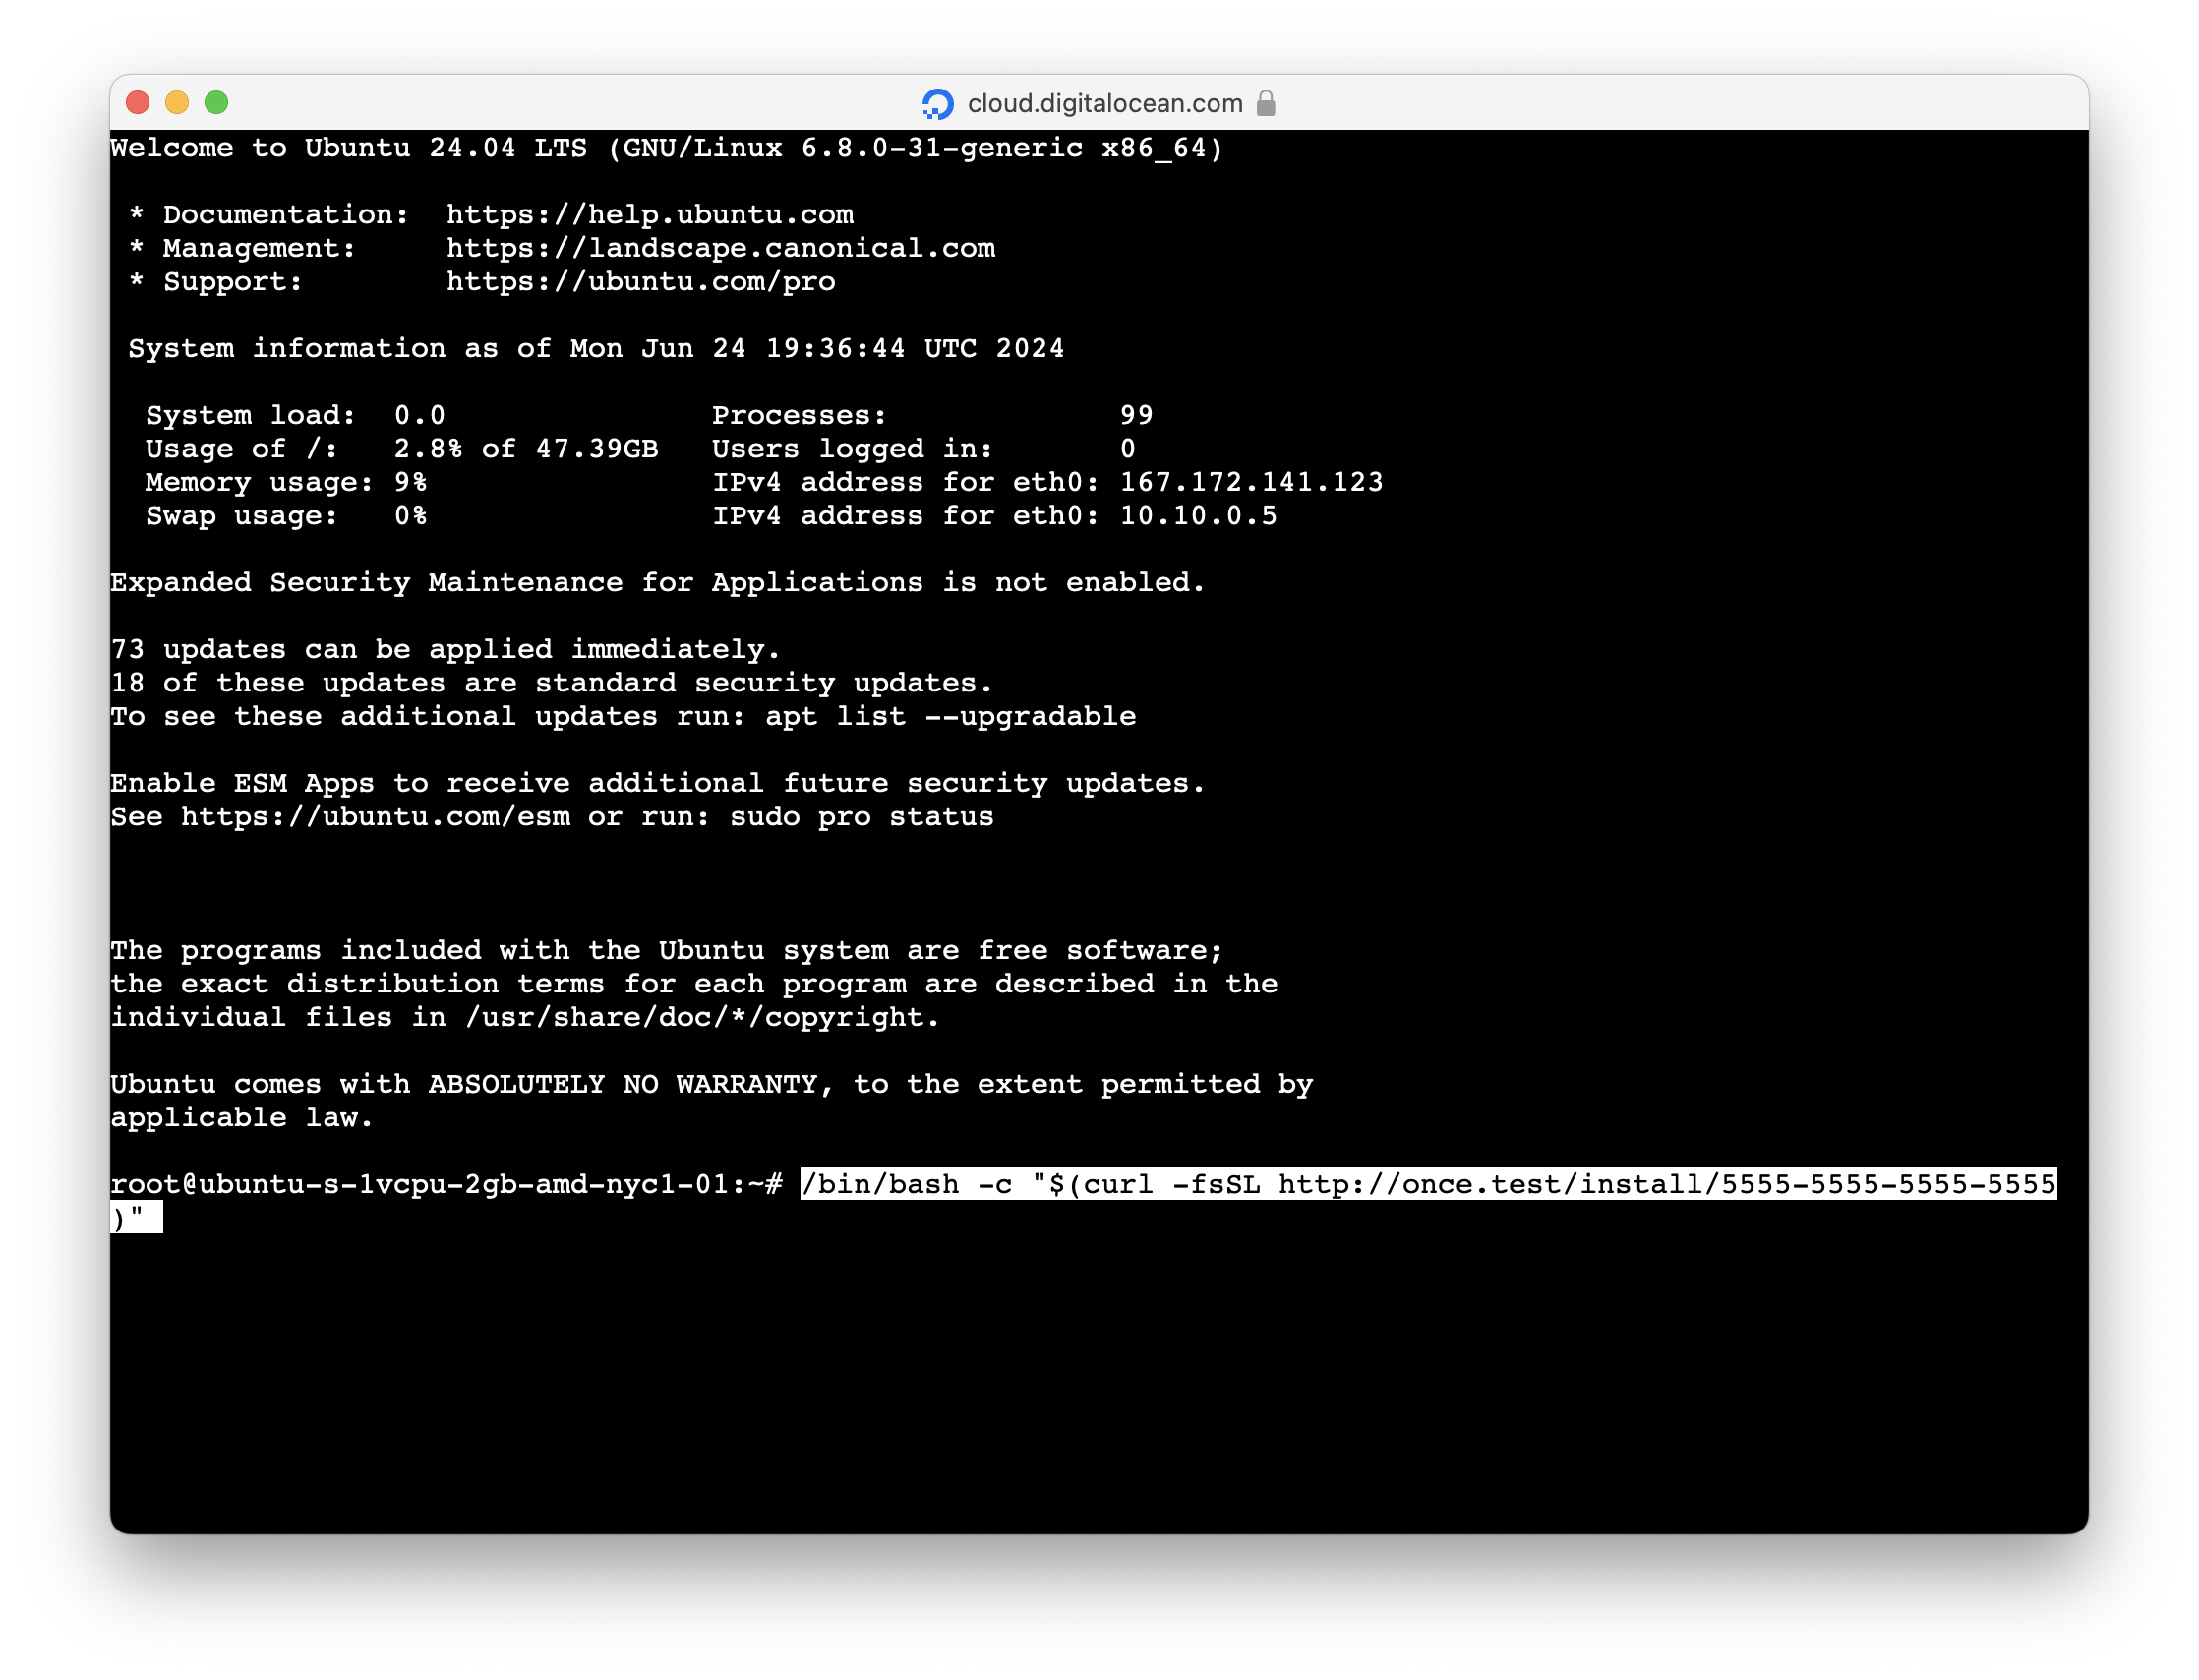
You'll be asked which domain name you will be using. That needs to be the same as the A record you set up in your domain manager. Type it in and ONCE will handle the rest. A few minutes later you'll see something like this:
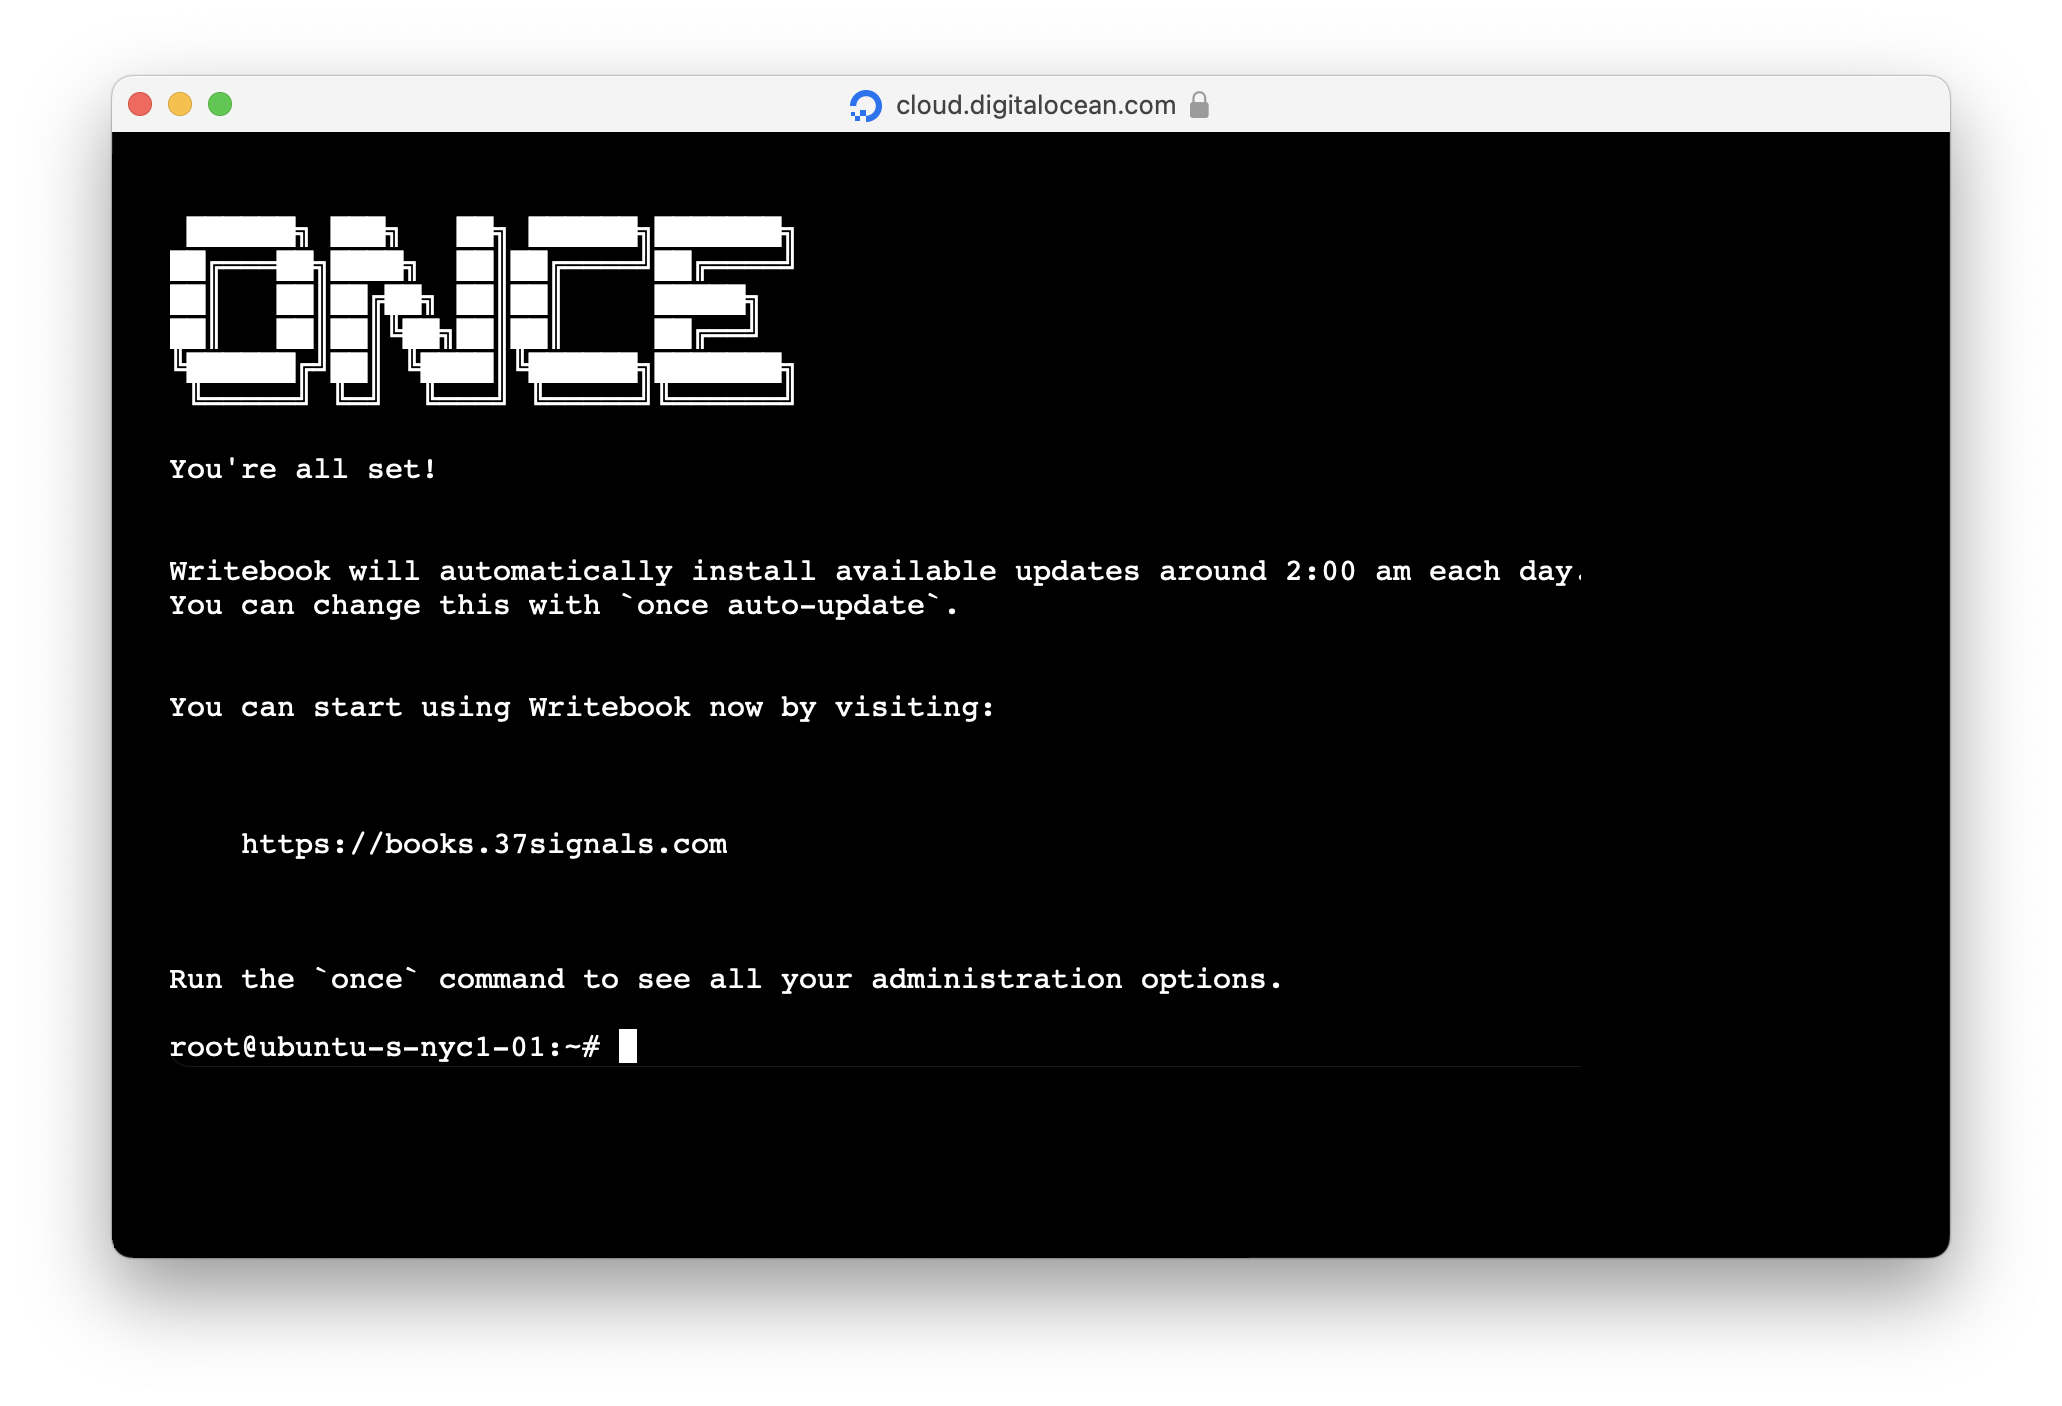
You're done! Open the URL in your web browser and set up your Writebook account.